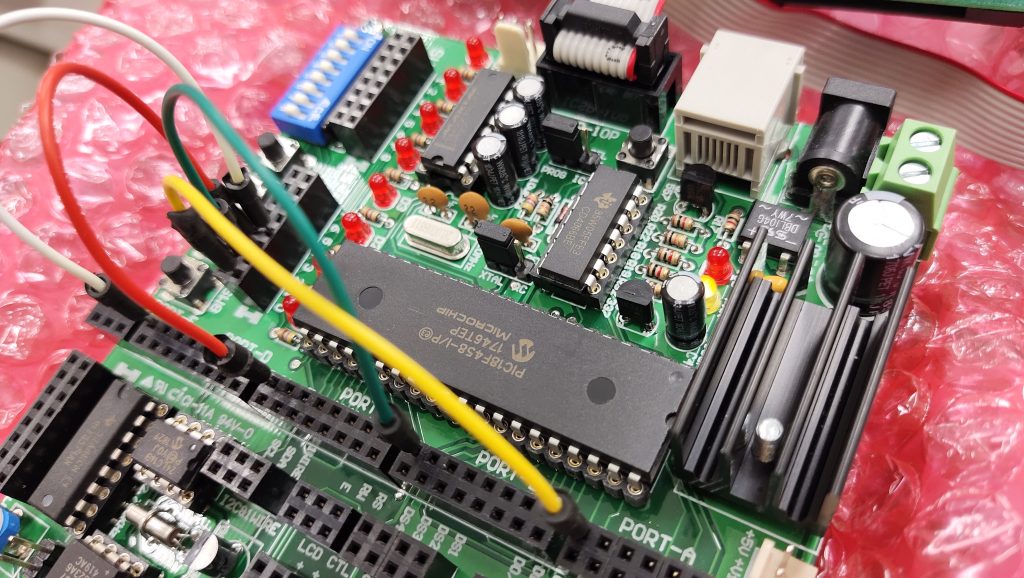
หลังจากที่ได้สร้างโครงงานและโค้ดโปรแกรมเบื้องต้นจากบทความการใช้ MPLAB X IDE ไปก่อนหน้านี้ บทความนี้เป็นการใช้งานไมโครคอนโทรลเลอร์เพื่อใช้เป็นหน่วยนำออกสัญญาณหรือการ Output และนำเข้าสัญญาณหรือ Input ผ่านทางพอร์ตของ PIC18F458 ทั้งพอร์ต A, B, C และ D ผ่านทางวงจร LED และ Switch
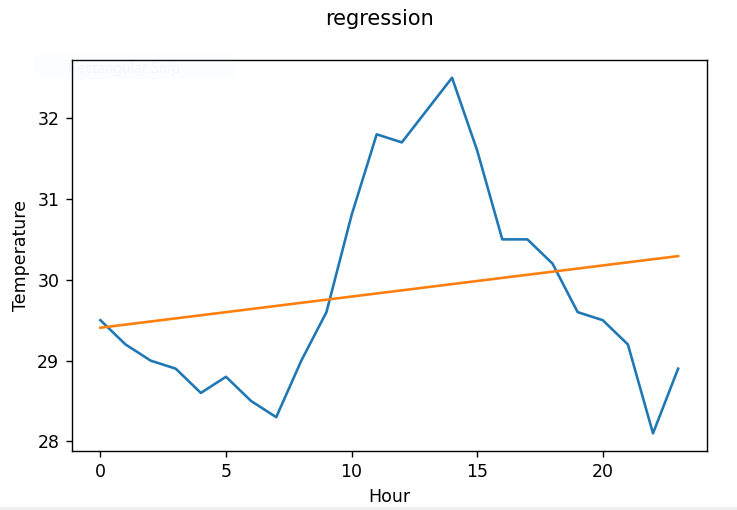
This article is to convert the implementation of the regression model from the article of ESP32-C3 to NumPy on Raspberry Pi and PC and use the display as Matplotlib, as shown in Figure 1, which can be found from the previous article. The temperature and humidity from the 1-day data were obtained from parameters a and b of the regression equation and the resulting equation or model was used to determine the possible temperature values over the 1 day.
This article introduces Unity3D, a very popular game creation program. Because there are so many facilities needed to make a game. Called quite complete, such as the manipulation of three-dimensional objects, gravity, system movement of objects, can create games on multiple platforms for example. Controlling objects requires knowledge of a programming language which can be practiced.
This article applies the ESP32 microcontroller’s DAC and MicroPython to open WAV files, which are audio recording files and exported to the DAC connected to the speakers as shown in Figure 1. The used file is an uncompressed 8-bit mono PCM audio file. And the sample program supports a sampling rate at about 50KHz or at 44100 level.
Figure 1 An example of a board to test the functionality of an article
This article discusses the use of PWM (Pulse Width Modulate) of the ESP32 microcontroller in the Arduino framework after discussing the functionality of this section in the ESP-IDF and MicroPython by connecting the board to the speaker as shown in Figure 1.
After introducing the SAM-D21 microcontroller board as shown in Figure 1 and using the ADC/DAC of this chip that is a 32-bit ARM Cortex-M0+ architecture microcontroller, this time we try to compile and use Python.
After testing the DAC and ADC of both the ESP32, SAM-D21, LGT8F328P and STM32L432KC, This time, it’s the time of the ESP32-S2 that we have. The test performance is still the same as before using the DAC. Three types of waves are sent out: zigzag, triangular, and sine waves and connect to the ADC pin to read the value and test the graph to see what it looks like.
In this experiment, DAC1 is connected to the ADC as shown in Figure 1. The ESP32-S2 has 2 ports of 8-bit DAC called DAC1 and DAC2. The ADC has a 12-bit resolution, which is seen to have the same properties as the ESP32, but whether the results are the same or not, you can tell that they are probably different because they use different microcontrollers. The ESP32-S2 uses the same one as the ESP32-S3 with only one core and no BLE.
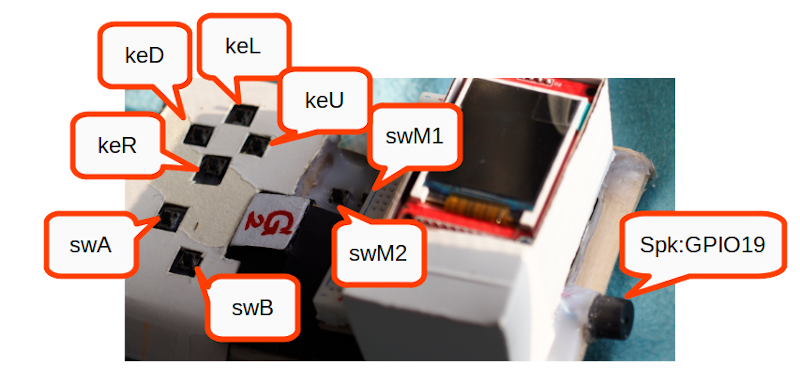
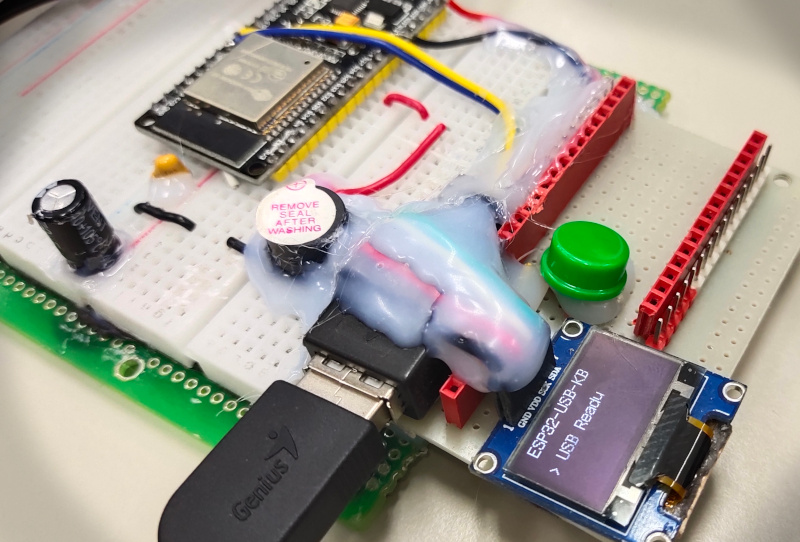
This article is an example of using nathalis‘s ESP32 Soft Host to try and test it on an OLED display with a resolution of 128×64 dots as shown in Figure 1 to receive data from a keyboard or mouse, it uses only a few GPIO pins but receives data from a keyboard with a large number of keys. Normally, the ESP32 microcontroller does not support a direct USB connection, so it requires programming by using a timer to check the status of the pins D- and D+ to be assembled into data at the byte level and assembled into packs of data for further interpretation.
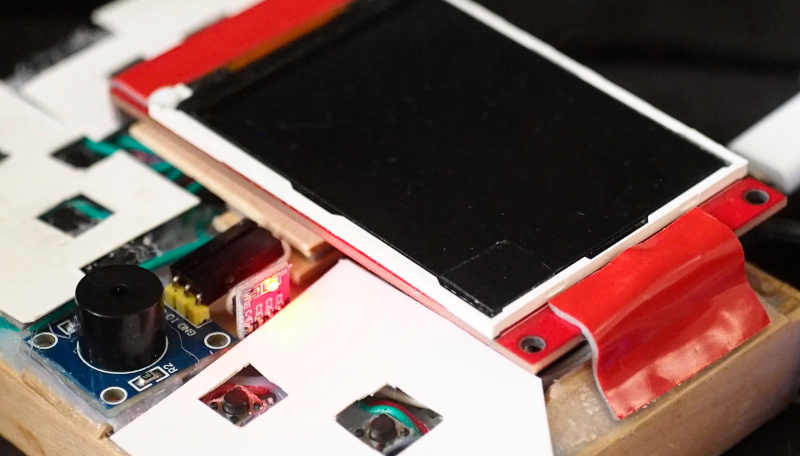
Figure 1 Connected devices and boards are illustrated in this article